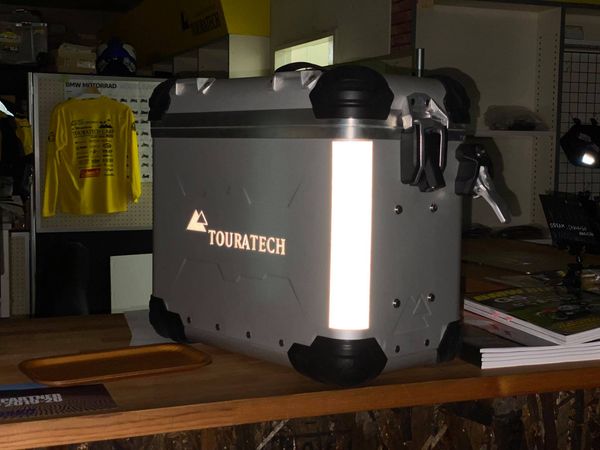
パニア用のリフレクティブコーナーシールの貼り付け方のご案内です。
1枚目の写真のように光を当てると強烈に反射して後方からの被視認性を向上して追突を防ぎます。
施工は簡単です。
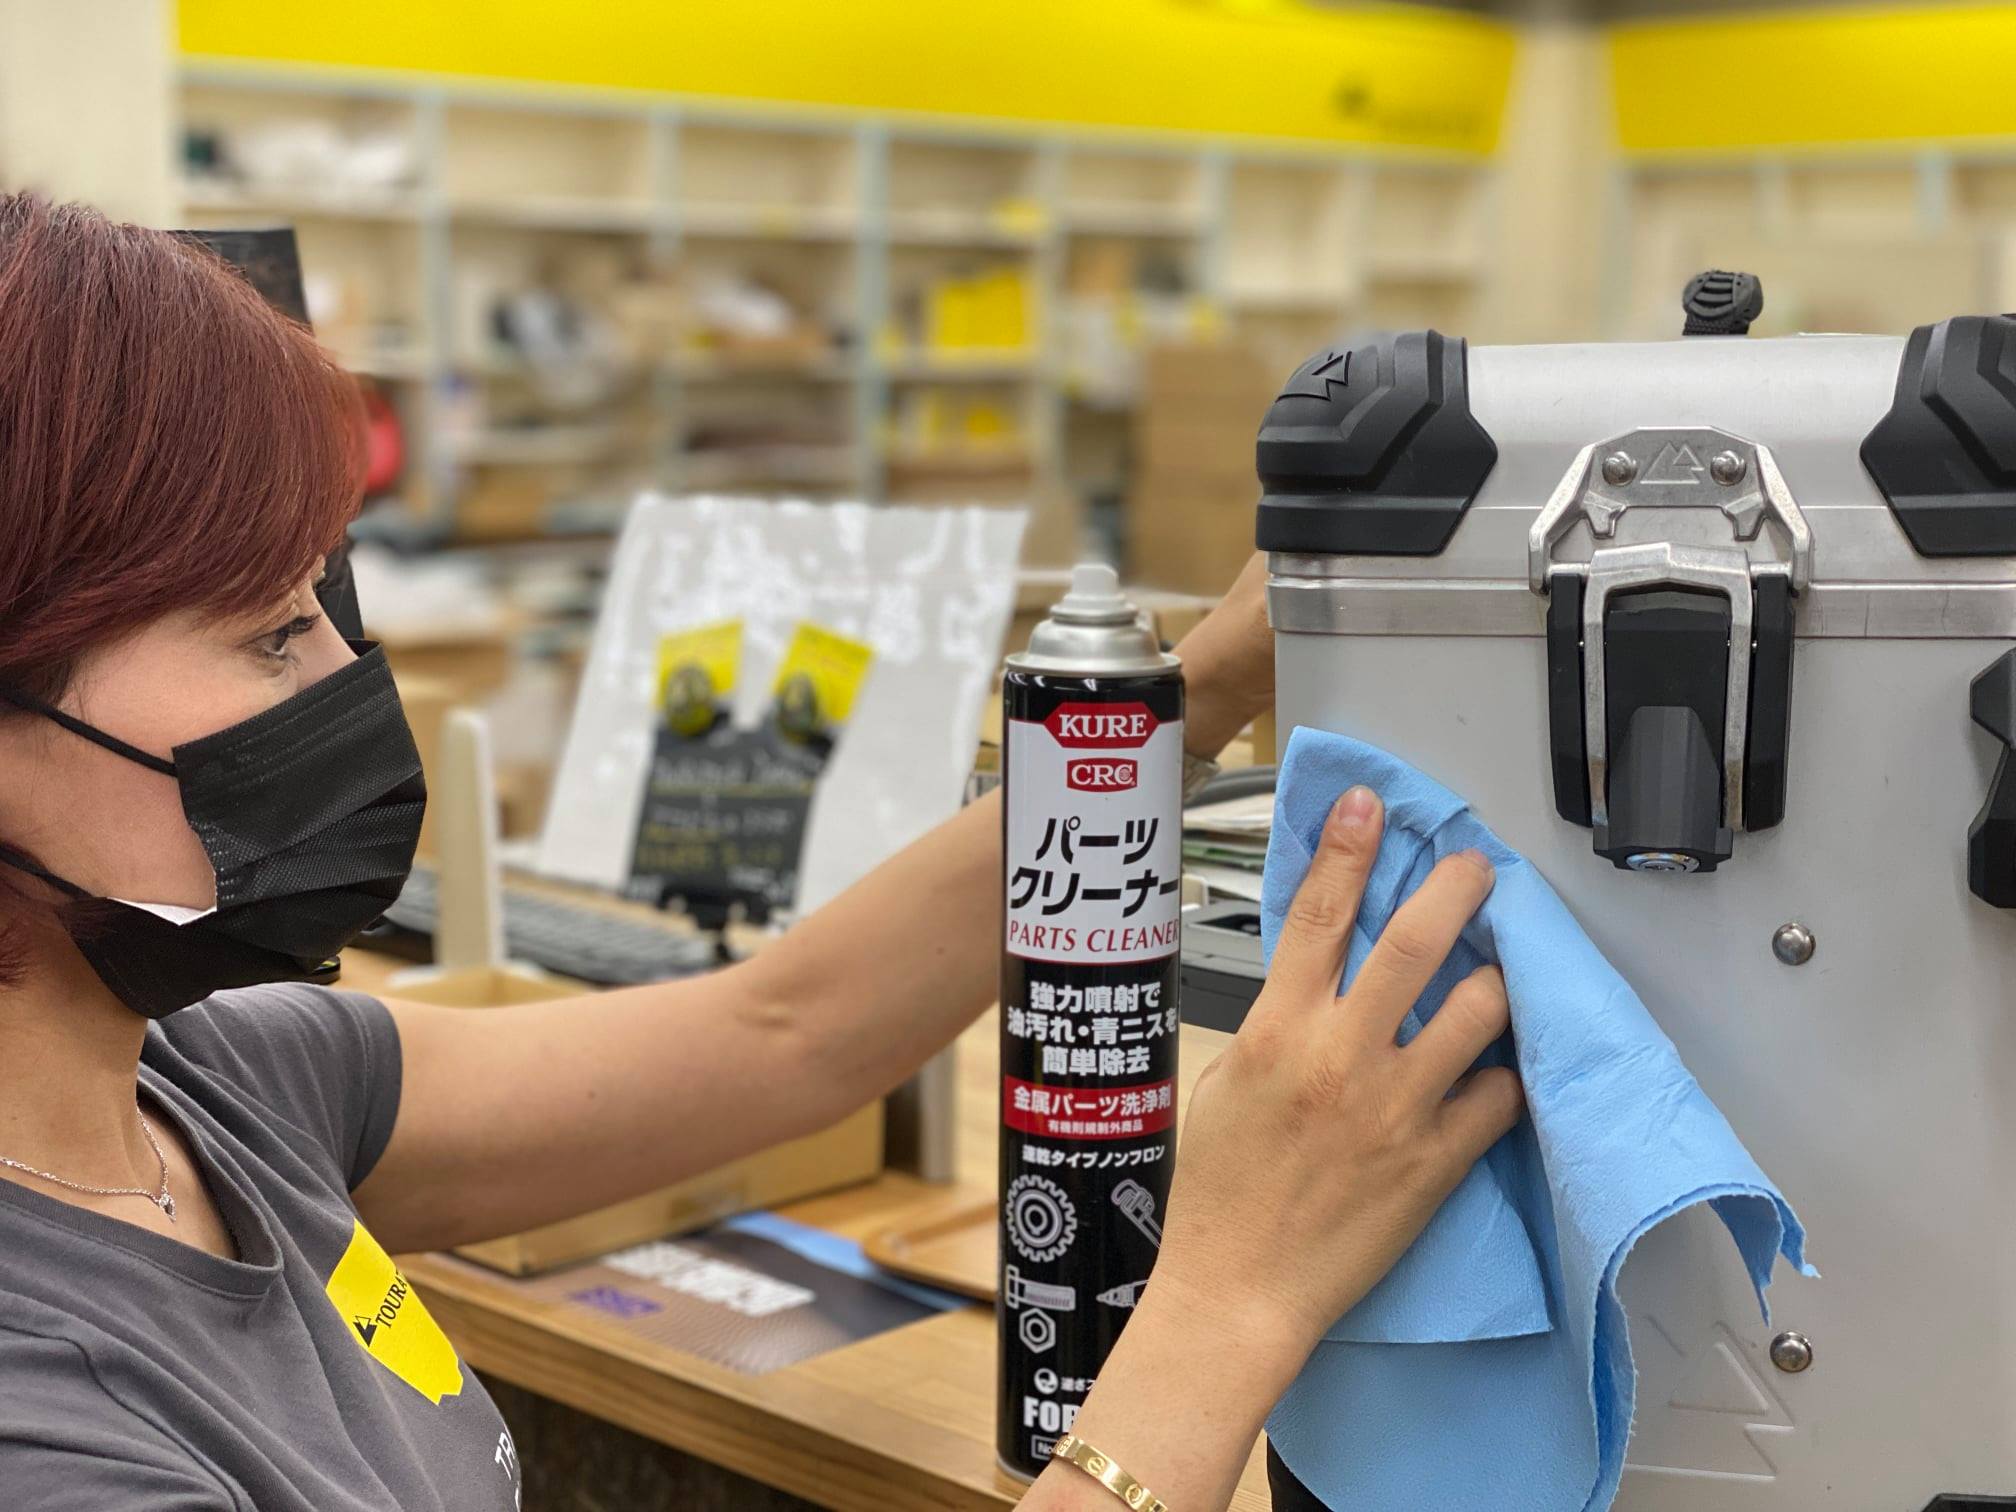
1.貼り付け部分をパーツクリーナーなどで脱脂します
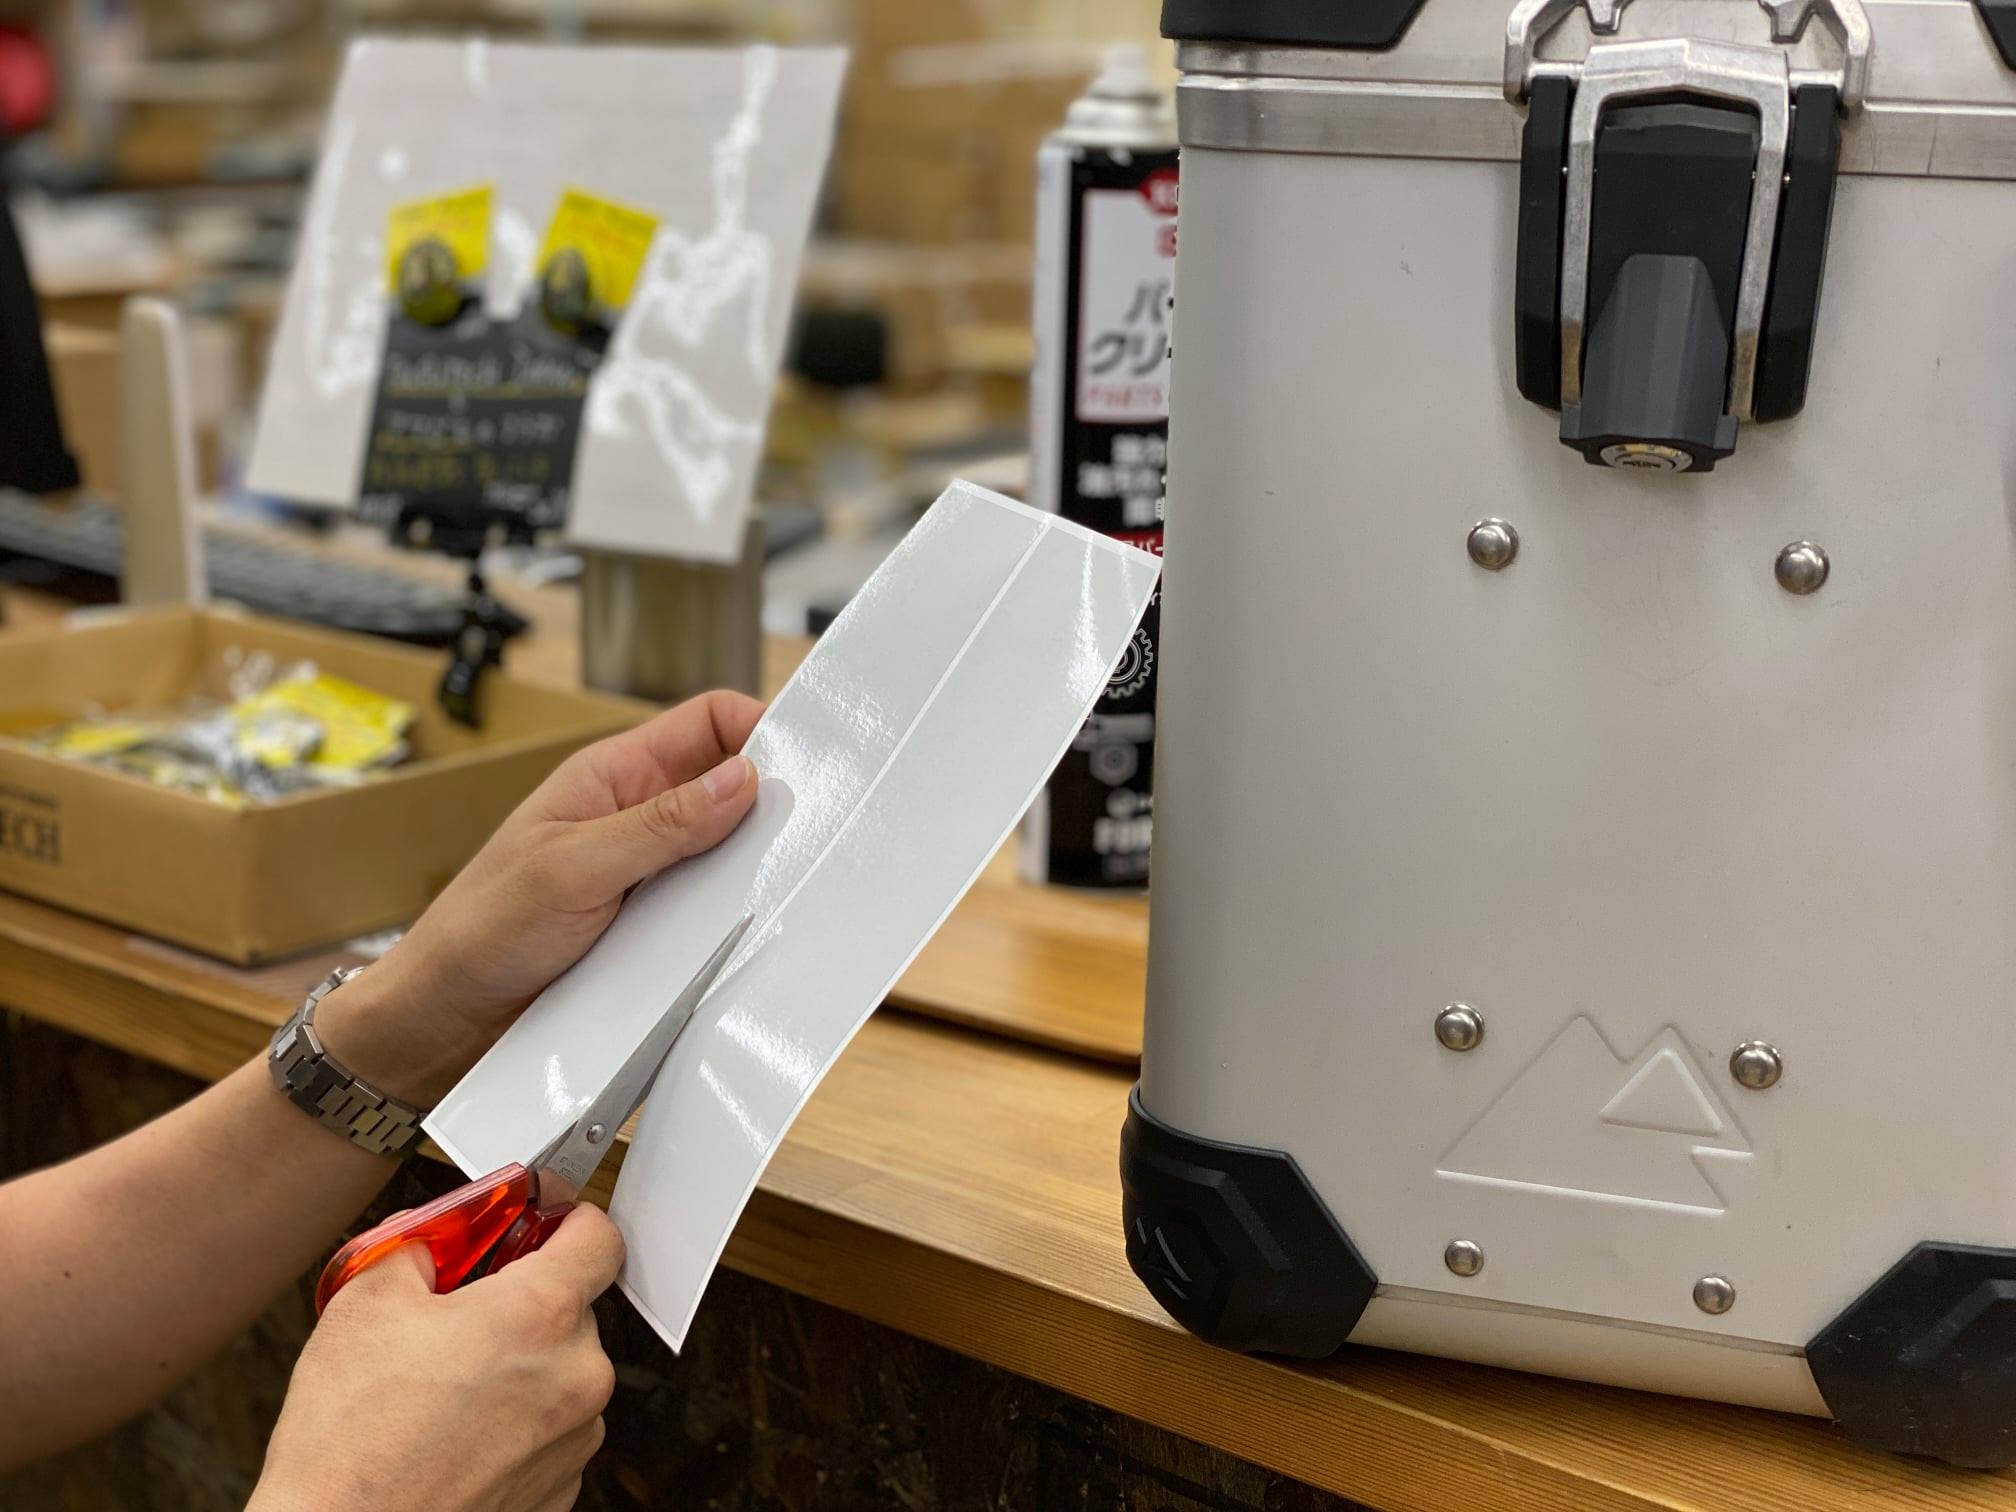
2.ステッカーを切り分けます
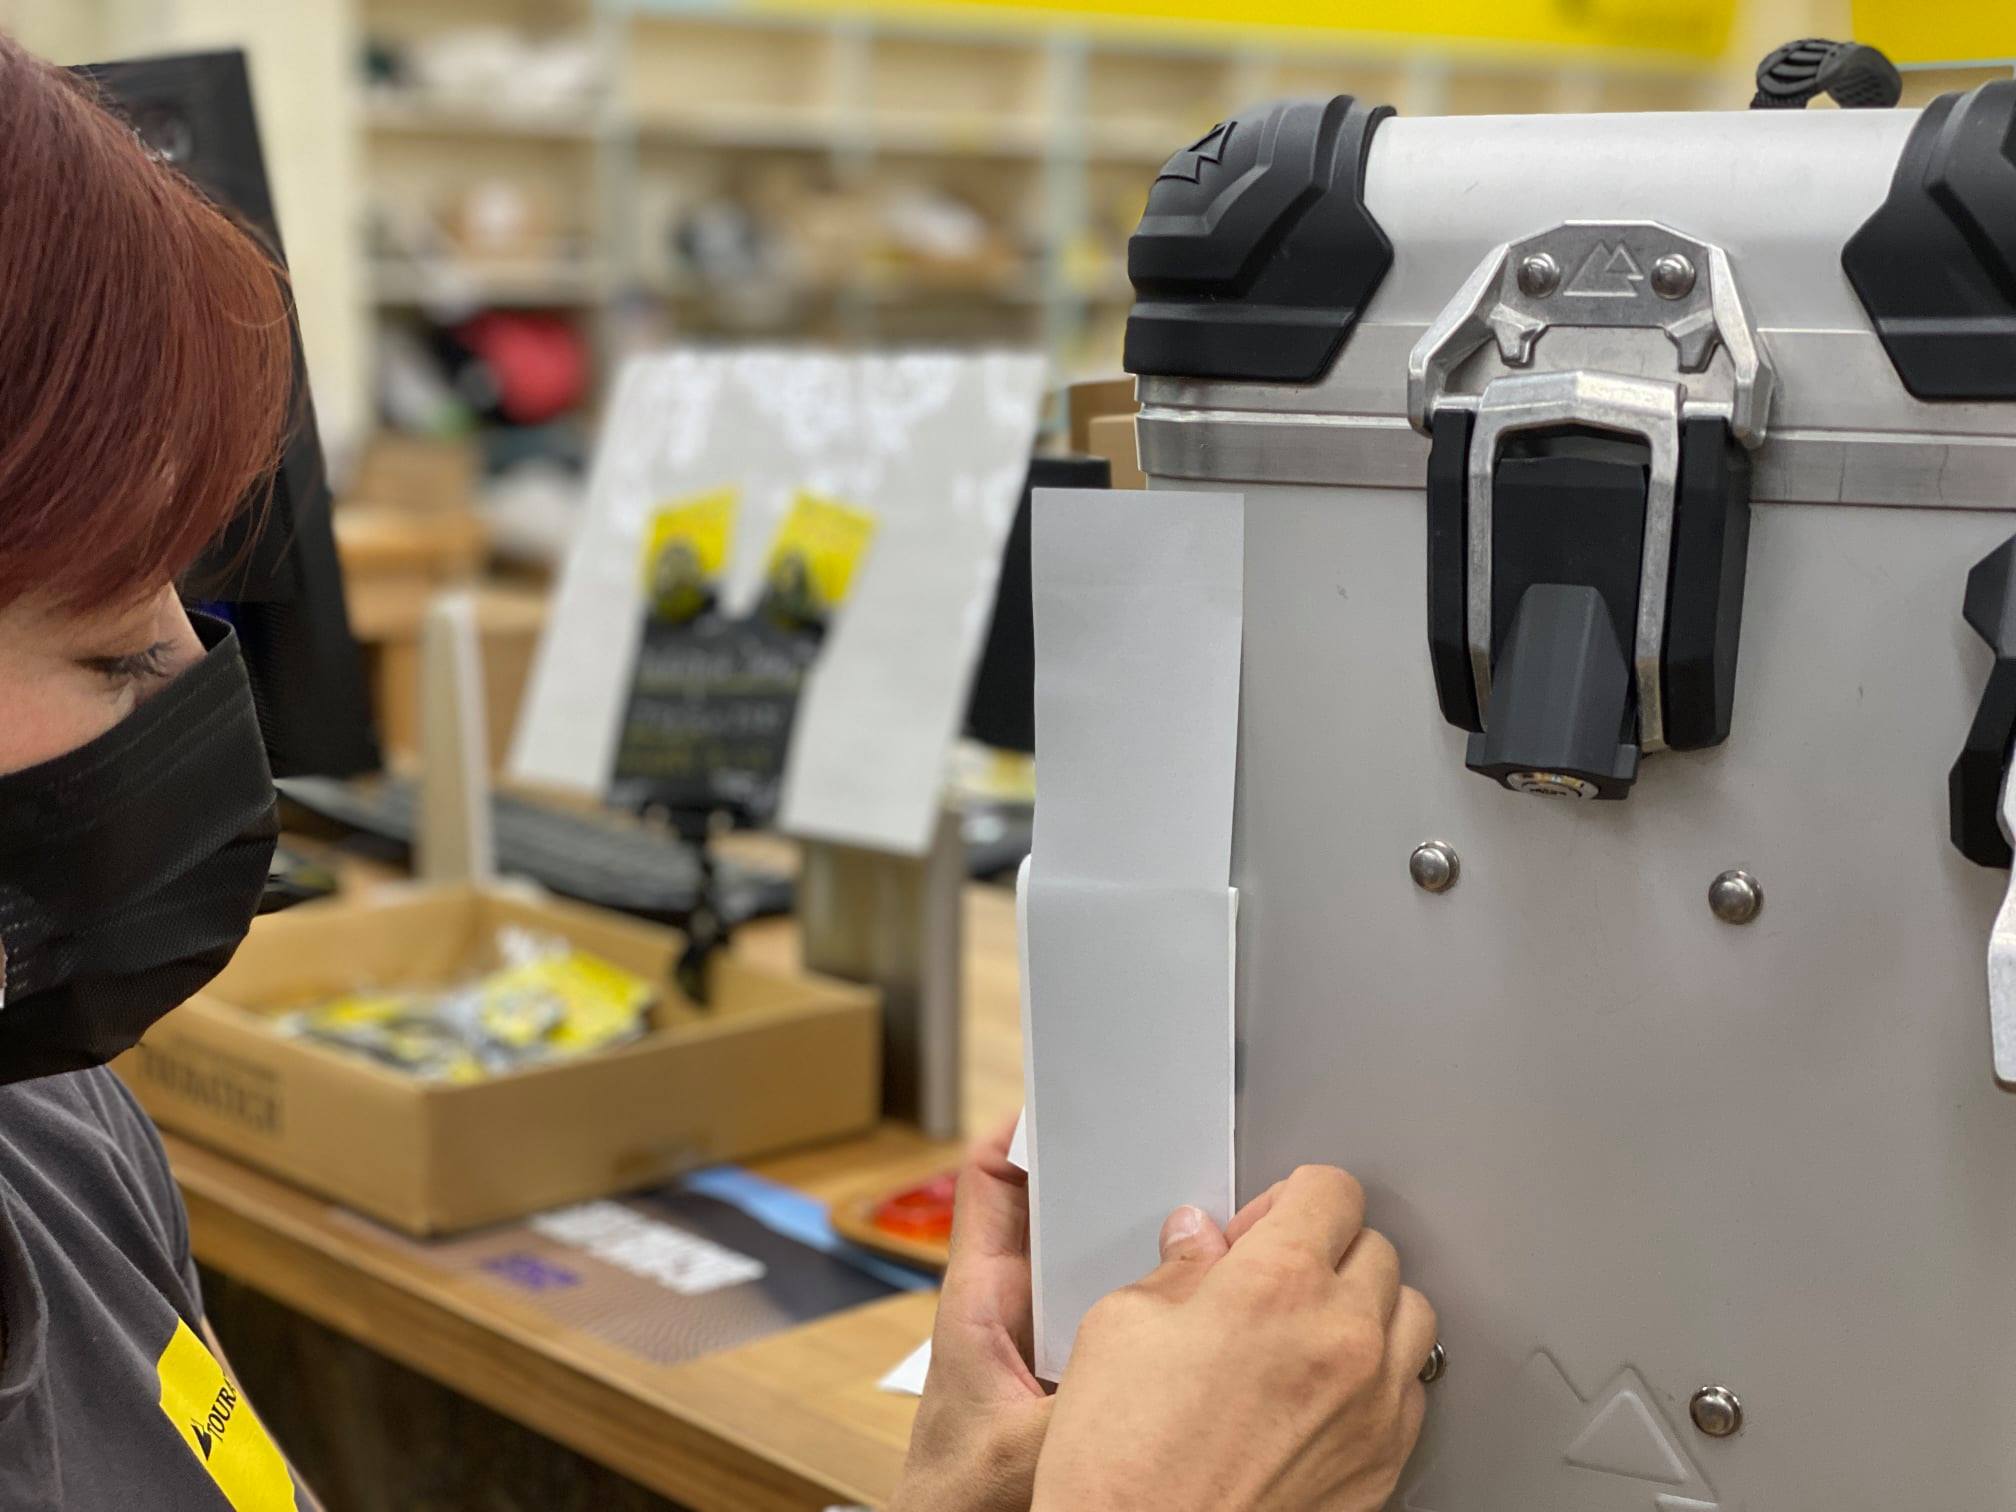
3.ステッカーをすこしだけ剥がして台紙を折り曲げます
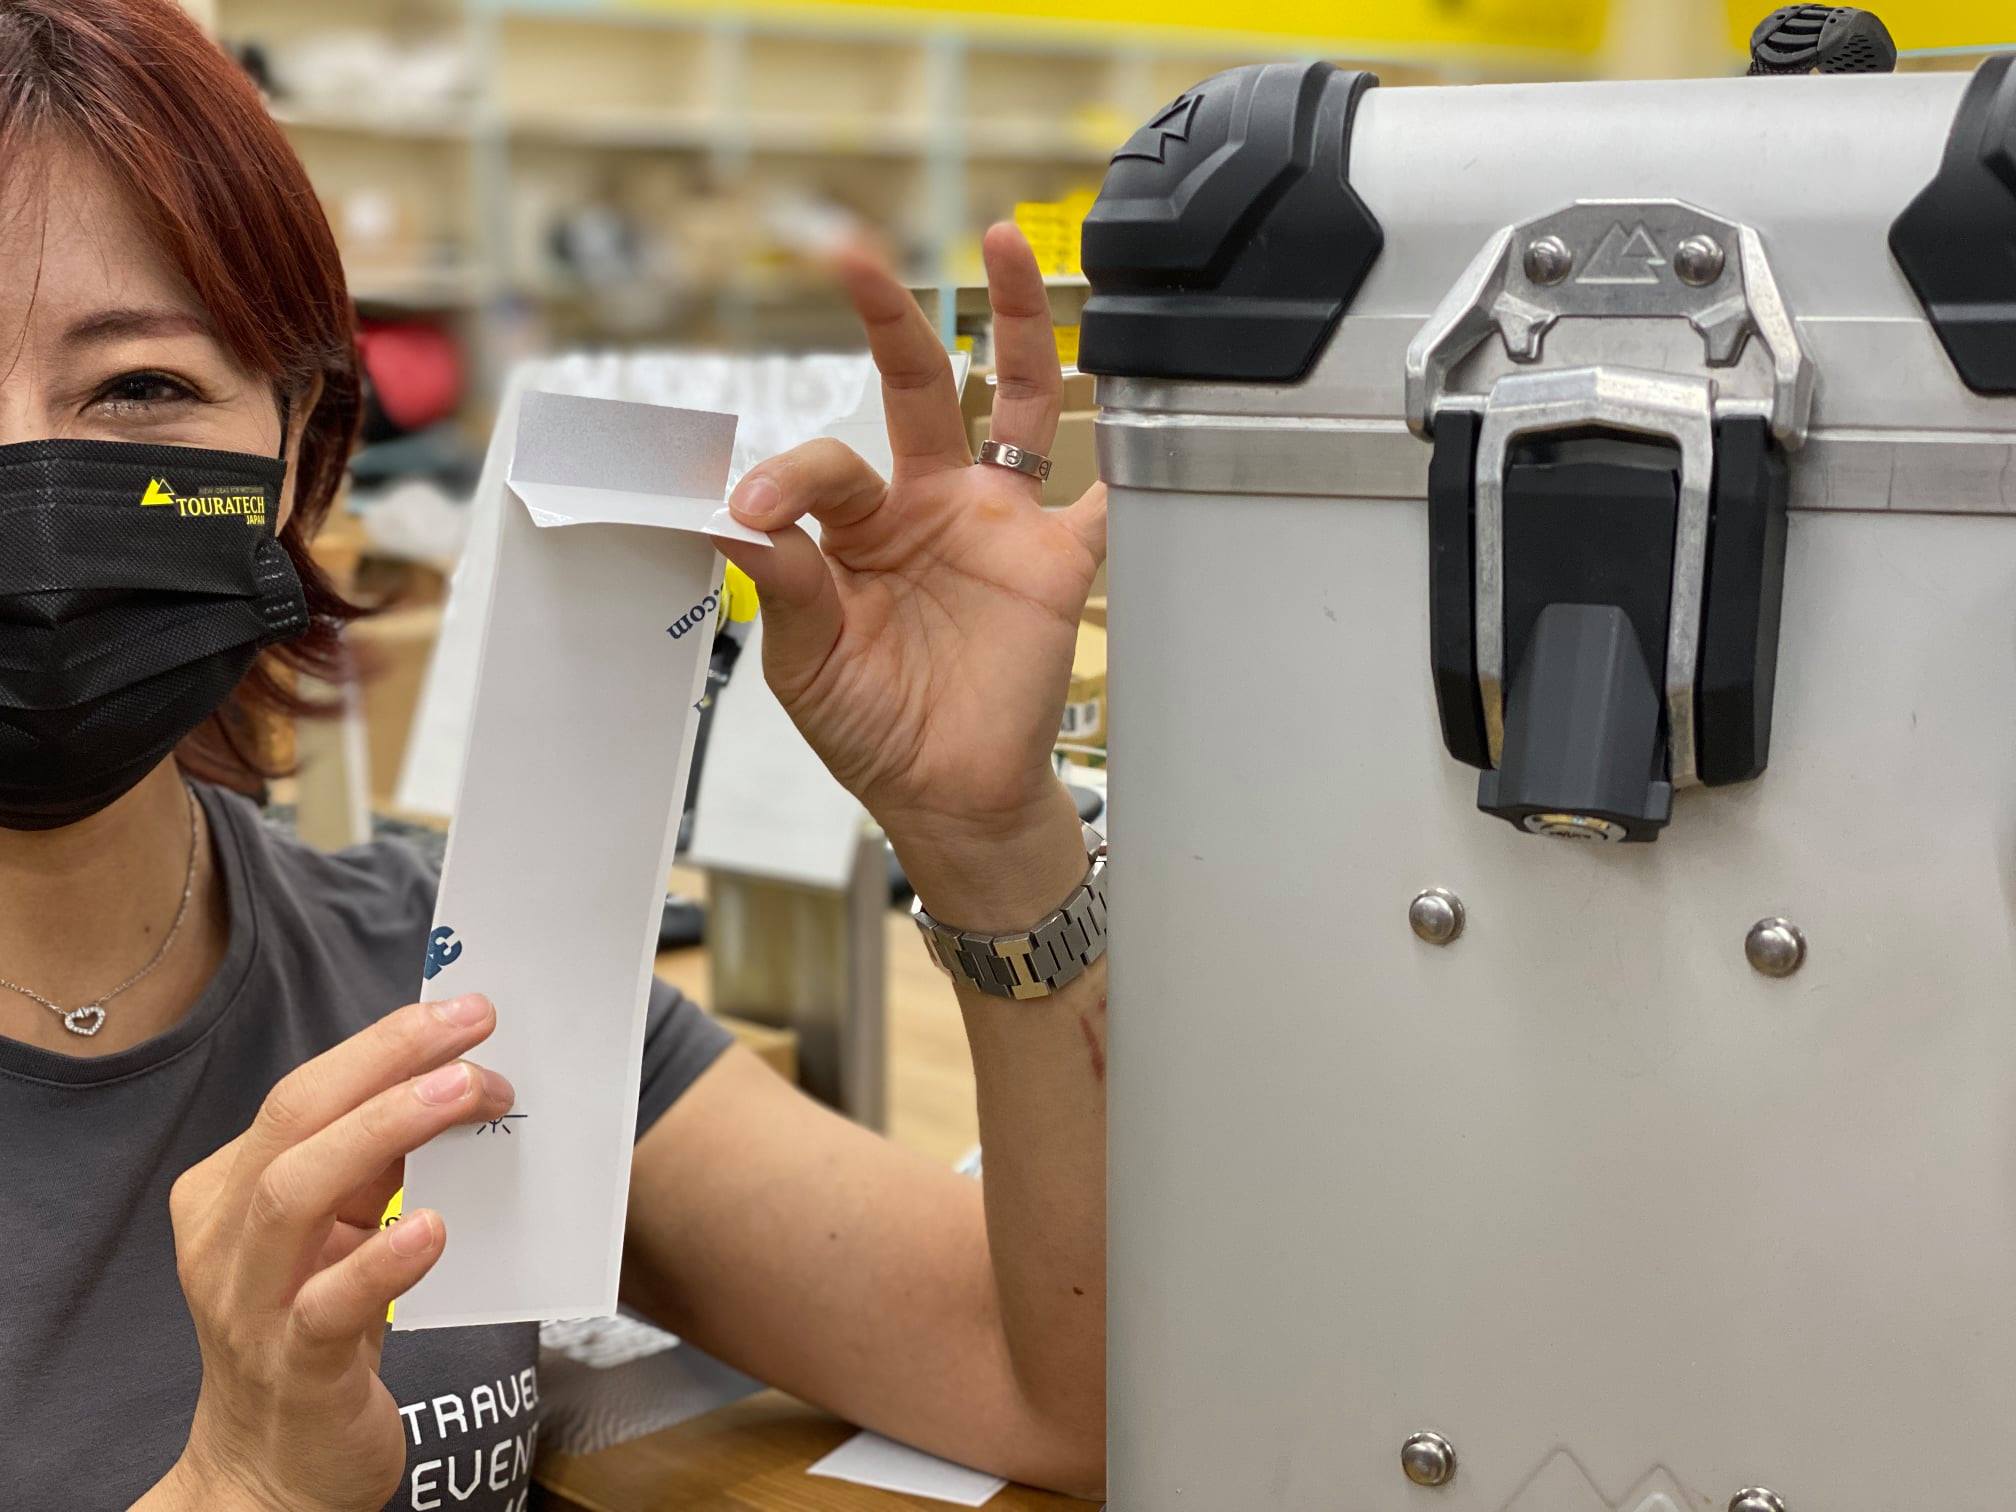
4.位置決めして剥がした部分を貼り付けます
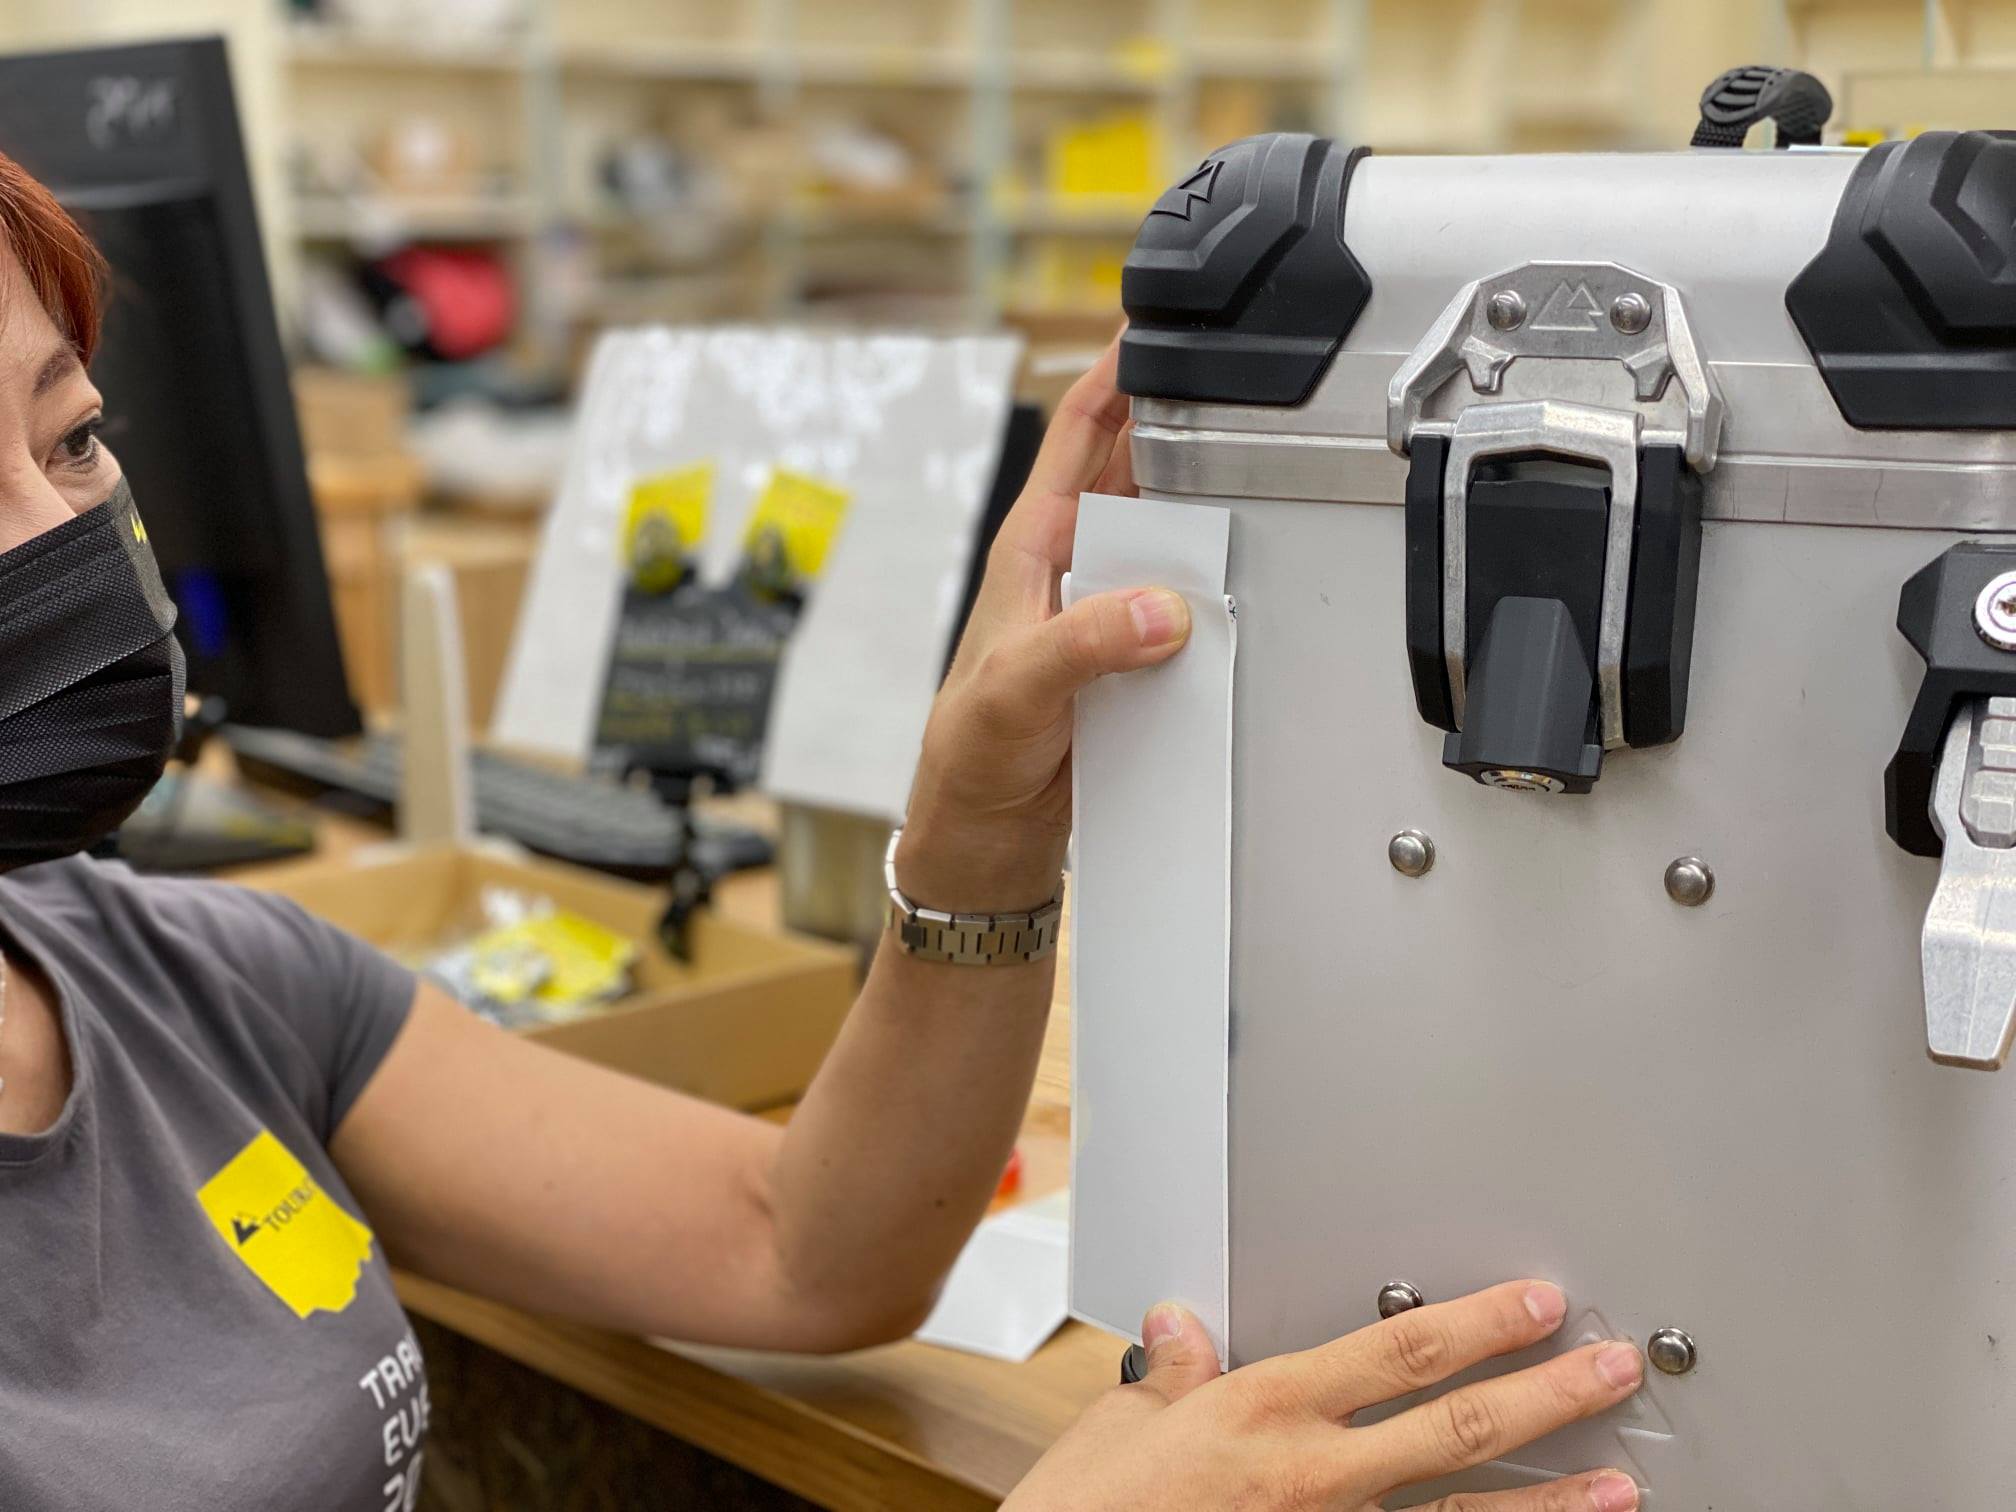
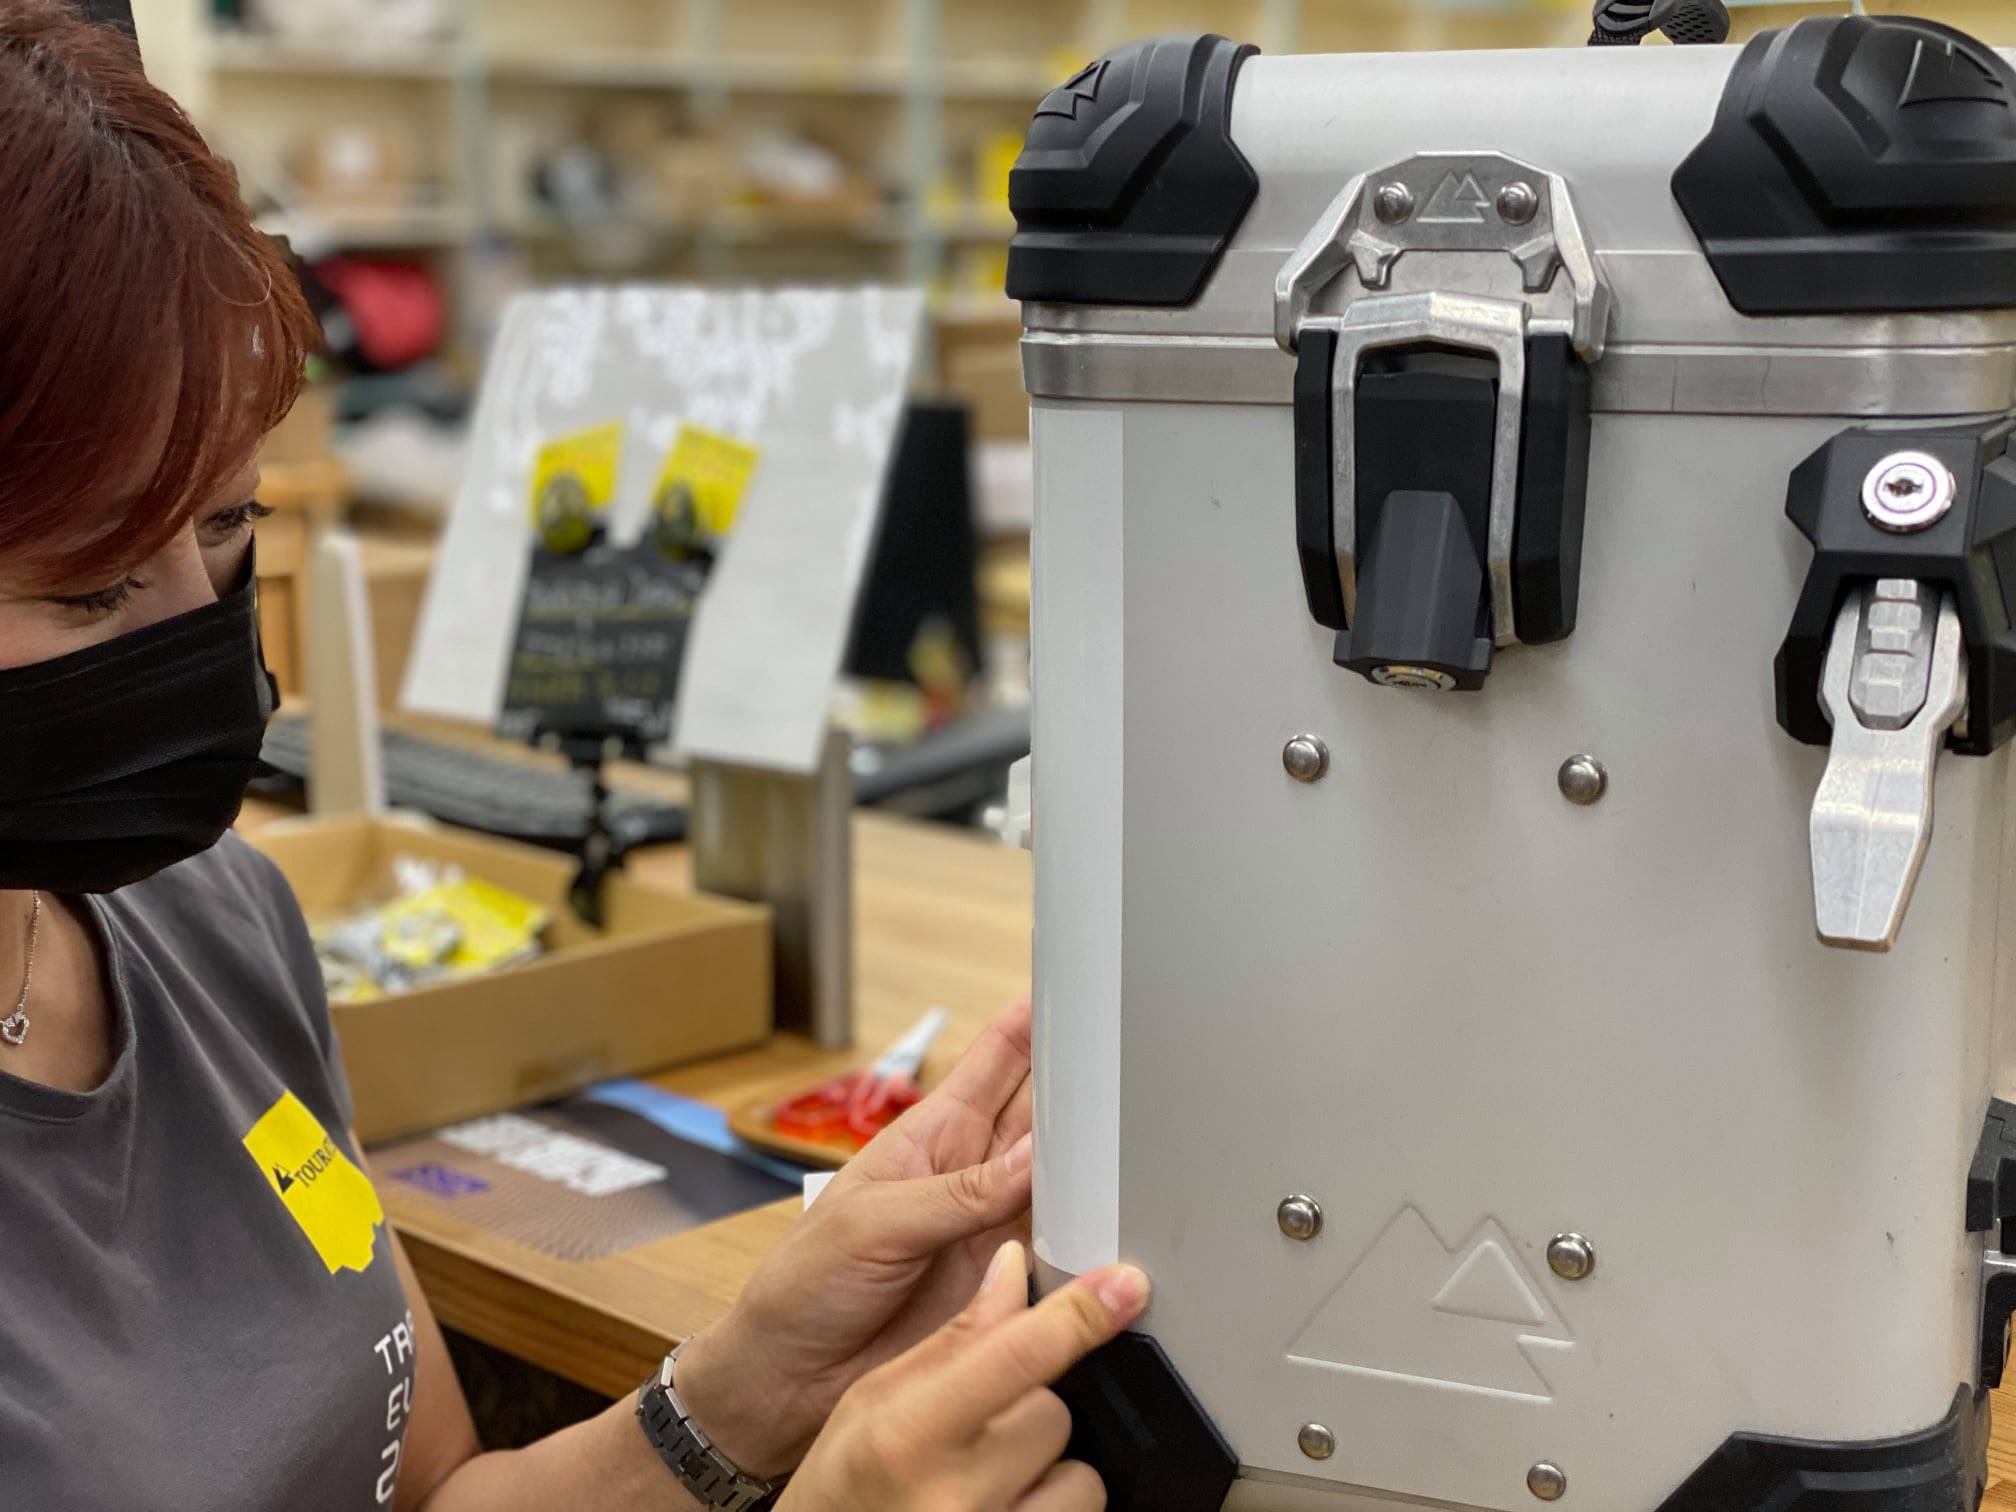
5.位置決めしたまま台紙を少しずつ剥がしていきます
6.ステッカー下の空気が残らないように指で押し出します
7.完成です
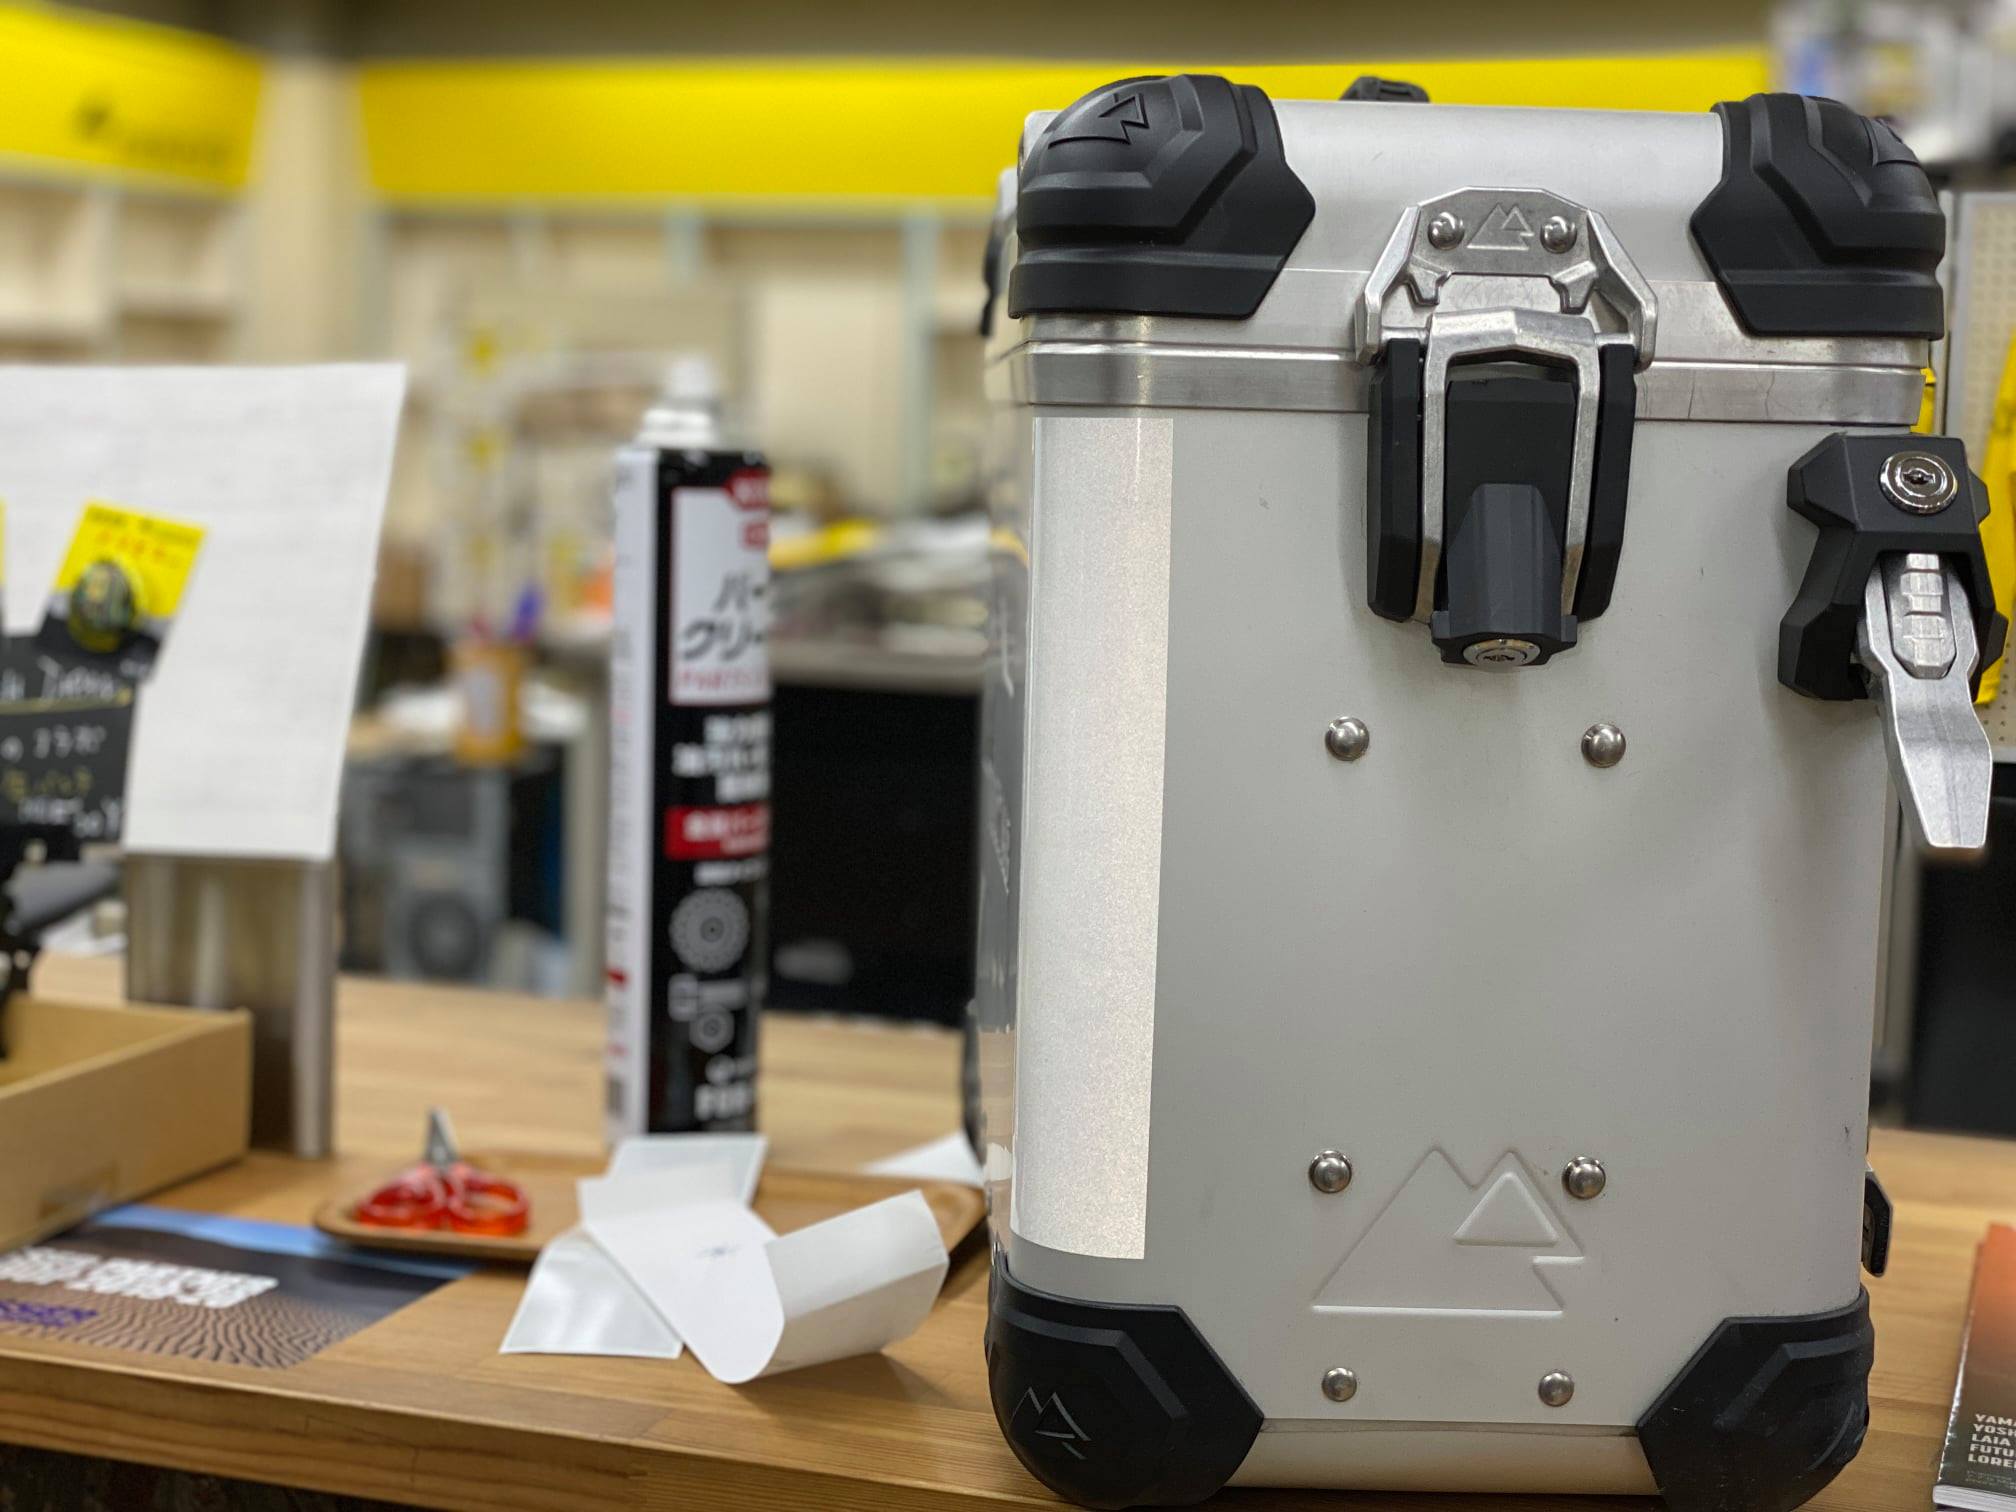
明るい場所ではステッカーは目立ちません。色は白、赤、黒があります。お好みでどうぞ!
ご購入はこちら